



Limited Edition Vehicle Customization Options: 2026 Guide
July 9, 2026
How to Store a Bespoke Classic Vehicle Properly
July 11, 2026
The restoration process for a ground-up Defender is a comprehensive frame-off rebuild that strips every component down to the bare chassis, inspects it with exacting care, and rebuilds it into something that honors the original while meeting modern standards of safety and performance. In the restoration trade, this is called a “frame-off” or “body-off” restoration, and it represents the most thorough form of complete vehicle restoration available. A Defender subjected to this process emerges not merely repaired, but genuinely reborn. Timelines range from months to over a year depending on condition and scope, and budgets scale accordingly. The result is a vehicle with verified provenance, structural integrity, and the kind of bespoke character that no factory line can replicate.
What preparatory steps are needed before a ground-up Defender restoration?
Preparation is where most restoration projects succeed or fail before a single bolt is turned. A thorough inspection and documentation plan must come first. Photograph every panel, undercarriage section, and interior corner before disassembly begins. These images become your reference library throughout the entire rebuild.
The workspace itself demands serious attention. You need a level concrete floor, adequate lighting, a quality engine hoist, axle stands rated for the Defender’s weight, and dedicated storage for labeled parts. Safety measures include proper ventilation for chemical treatments, fire suppression equipment, and personal protective gear rated for hazardous materials exposure. Hidden corrosion and old underseal can contain lead compounds that require careful handling.

Before sourcing parts, build a detailed inventory of what you have, what needs repair, and what requires full replacement. Original Land Rover components carry authenticity value, but compatible aftermarket parts often offer superior metallurgy at lower cost. Budgeting realistically is non-negotiable. Restoration projects commonly run between £20,000 and £50,000 depending on condition and the scope of work. That figure reflects parts selection, labor hours, and the depth of modernization you choose to pursue.
Essential tools for a frame-off Defender restoration:
- Engine hoist and transmission jack
- Angle grinder with wire brush and cutting discs
- MIG welder for chassis and body repairs
- Sandblasting equipment or access to a professional blasting service
- Torque wrench set covering 10–300 ft-lbs
- Electrical multimeter and wiring diagram set
- Parts washer and degreaser tank
- Labeled storage bins and a parts manifest spreadsheet
Pro Tip: Photograph every electrical connector, hose routing, and bracket position before removal. A single missing reference photo can cost you hours during reassembly.
How to systematically disassemble and inspect the Defender
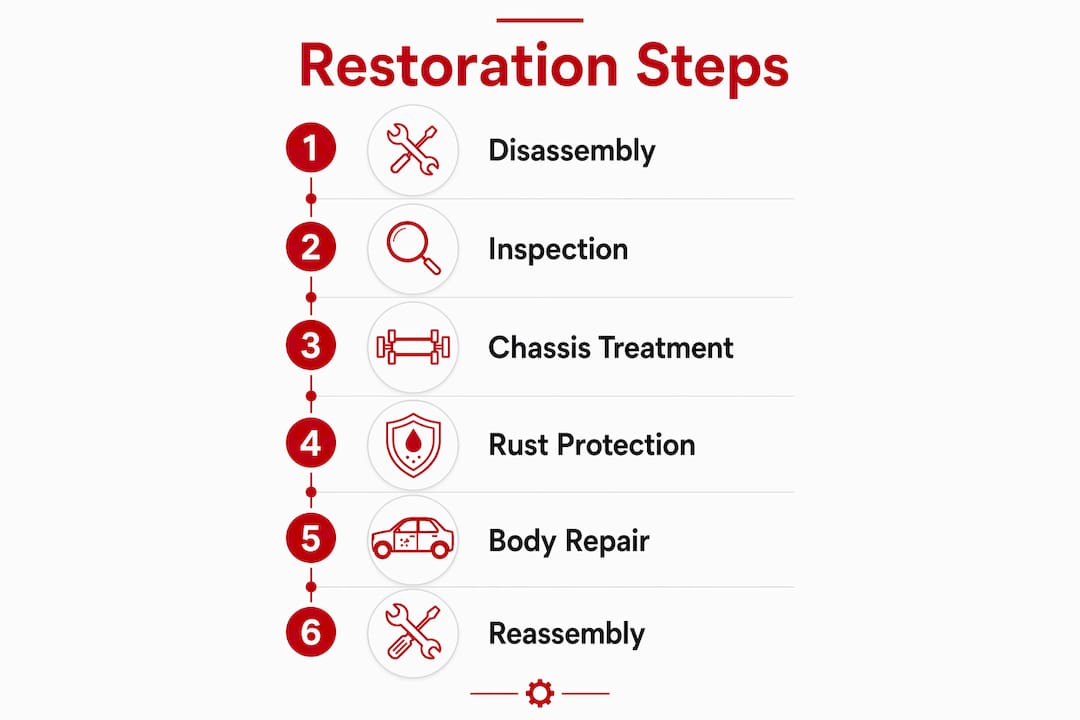
Disassembly is a discipline, not a demolition. Indexing every part prevents loss and confusion during reassembly, and that discipline pays dividends weeks later when you are rebuilding under time pressure. Use numbered tags, zip-lock bags, and a master parts log that cross-references each component to its photograph.
Step-by-step disassembly sequence
- Drain all fluids: engine oil, coolant, brake fluid, and fuel.
- Remove the body tub from the chassis using the engine hoist and four-point lift points.
- Strip the interior completely: seats, trim panels, headliner, and wiring harnesses.
- Remove the drivetrain: engine, gearbox, transfer case, and prop shafts as a staged sequence.
- Pull the front and rear axles, suspension components, and steering gear.
- Strip the chassis of all remaining brackets, fuel lines, and brake lines.
Once the chassis stands bare, inspect every rail, crossmember, and outrigger for corrosion, cracks, and deformation. Defenders built before the mid-1990s are particularly prone to outrigger rot where water collects behind the body tub. Probe suspect areas with an awl rather than assuming surface rust is superficial.
The drivetrain inspection covers the engine block for cracks and bore wear, the gearbox for synchromesh condition, and the axles for differential play and halfshaft integrity. Electrical wiring harnesses on older Defenders frequently show cracked insulation and corroded connectors. Document every fault in a repair log with a severity rating: repair, rebuild, or replace.
Common disassembly pitfalls to avoid:
- Forcing seized bolts without penetrating oil, which shears studs into the block
- Mixing hardware from different assemblies, which causes torque and thread-pitch errors later
- Skipping the wiring diagram before pulling harnesses, which creates a reassembly puzzle
- Neglecting to measure suspension geometry before removal, losing your baseline alignment data
Pro Tip: Soak every fastener in penetrating oil 24 hours before disassembly. Defenders are notorious for seized bolts, and patience here prevents expensive damage to threads and castings.
Which restoration techniques ensure authenticity and performance?
The core philosophy of a quality Defender rebuild is what the industry calls the restomod approach: preserve the vehicle’s historic silhouette and character while carefully adding modern components that enhance safety and performance. The goal is a vehicle that looks unmistakably Defender but drives with the confidence of a modern machine.
Chassis treatment begins with sandblasting to bare metal, followed by rust-neutralizing primer and a protective epoxy coating. Proper surface treatment determines the structural longevity of the entire build. Weld repairs on compromised outriggers and crossmembers must be completed before any coating is applied.
Body panel repairs preserve original aluminum where possible, since Defender aluminum panels resist corrosion well and carry provenance value. Steel replacement panels require zinc primer before topcoat. The goal is to avoid the “kit-car” look that comes from mismatched panel gaps and inconsistent surface texture. Restorers who blend classic aesthetics with modern upgrades consistently produce builds that hold their value better than those that over-modify.
| Restoration area | Traditional approach | Restomod approach |
|---|---|---|
| Chassis | Strip and repaint original frame | Sandblast, weld repair, epoxy coat |
| Engine | Rebuild original unit | Rebuild or swap to modern V8 or diesel |
| Electrical | Rewire with period-correct loom | Full modern harness with fuse block |
| Interior | Restore original vinyl and trim | Custom leather, modern instrumentation |
| Suspension | Rebuild with OEM spec parts | Uprated springs, dampers, and geometry |
Pro Tip: When rebuilding the engine, have the block professionally hot-tanked and measured before machining. Surface cleaning alone misses internal gallery deposits that cause premature bearing wear.
How to reassemble and finish the Defender restoration
Reassembly rewards the discipline you applied during disassembly. Every labeled bag and photograph now earns its keep. The chassis goes back together first: axles, suspension, steering, and brake lines installed and torqued to specification before the body tub returns.
Reassembly sequence for quality and fit
- Install the rebuilt axles, springs, and dampers onto the treated chassis.
- Route and secure new brake lines and fuel lines before the body obscures access.
- Lower the body tub onto the chassis and align body mounts before final torque.
- Install the rebuilt or replacement engine and gearbox as a dressed unit.
- Route the new wiring harness and connect all electrical systems before trim installation.
- Complete interior work: upholstery, instrumentation, and sound deadening.
- Apply exterior finish: paint, trim, grille, and lighting.
Interior restoration is where the character of the build becomes personal. Custom leather upholstery transforms the cabin from utilitarian to genuinely luxurious without compromising the Defender’s working-vehicle DNA. Modern instrumentation, including digital gauges and integrated navigation, can be fitted behind period-correct bezels to maintain visual authenticity.
Exterior finishing requires primer, color coat, and clear coat applied in a dust-controlled environment. Grille selection is one of the most visible customization decisions you will make. Original-style grilles preserve provenance; aftermarket options in powder-coated steel or stainless add durability. Testing before final sign-off covers brake function, electrical system integrity, cooling system pressure, and a minimum 50-mile road evaluation.
Pro Tip: Apply sound deadening to the floor, bulkhead, and roof before any trim goes in. Defenders are notoriously loud, and this single step transforms the driving experience without altering the vehicle’s appearance.
What common challenges should you expect during a Defender rebuild?
Hidden corrosion is the most disruptive challenge in any frame-off project. You will find it in places the pre-disassembly inspection could not reach: inside box sections, behind bulkhead panels, and within door pillars. Budget a contingency of at least 15–20% of your total estimate specifically for structural repairs discovered mid-project.
Sourcing rare or original parts tests every restorer’s patience. Genuine Land Rover components for Series-era and early Defender models are increasingly scarce. Reputable specialist suppliers carry quality reproductions, but verify dimensional accuracy before installation. A mismatched part that requires rework costs more than a correct part sourced carefully.
The most expensive mistake in a Defender restoration is rushing the chassis inspection. One missed crack in a crossmember, left untreated under a fresh coat of epoxy, becomes a structural failure that forces a complete strip-down months later. Slow down at the inspection phase. Every hour spent there saves ten in rework.
Alignment errors during reassembly are common and costly. Measure axle casing alignment relative to the chassis centerline before final torque. Incorrect pinion angles cause driveline vibration that is difficult to diagnose once the vehicle is fully assembled. When the complexity of a repair exceeds your tooling or expertise, engaging a specialist is the correct decision, not a concession. If you are considering selling a project vehicle that is not worth completing, resources on selling used vehicles can help you recover value and redirect funds to a more suitable candidate.
Key Takeaways
A ground-up Defender restoration succeeds through disciplined disassembly, thorough chassis treatment, and a clear philosophy that balances original character with modern reliability.
| Point | Details |
|---|---|
| Frame-off is the standard | Full disassembly to the bare chassis is the only method that guarantees every component is inspected and treated. |
| Documentation prevents rework | Photograph and label every part before removal to eliminate reassembly errors and lost components. |
| Chassis treatment determines longevity | Sandblasting, weld repair, and epoxy coating must be completed before any other rebuild work begins. |
| Budget for hidden damage | Allocate a contingency reserve for corrosion and structural repairs discovered after disassembly. |
| Restomod philosophy preserves value | Maintaining the Defender’s original silhouette while upgrading mechanicals produces builds that hold their investment value. |
What 15 years of Defender restorations actually taught me
The Defender restoration community talks a great deal about parts quality and paint codes. What gets discussed far less is the moment you lift the body tub off a chassis and confront what 30 years of British weather and neglect have actually done to the steel underneath. That moment defines the entire project.
The restorers I respect most treat the chassis inspection as the emotional and technical center of the build, not a preliminary step to get through quickly. They document, measure, and plan before they weld a single inch. The vehicles that come out of that discipline are the ones that remain reliable for another 30 years.
The other lesson is about restraint. The temptation to modify everything is real. A Defender is a large sandbox, and the aftermarket offers no shortage of ways to fill it. But the builds that age best, the ones that still look right a decade later, are the ones where the restorer asked “does this serve the vehicle’s character?” before fitting anything. Paying genuine homage to the classic Defender is not a limitation. It is the highest form of craft in this discipline.
— Evolve
Ecdautodesign’s approach to bespoke Defender restoration
Ecdautodesign has built its reputation on exactly the kind of ground-up craftsmanship this guide describes, applied at a level of finish that has drawn coverage from outlets including Car Buzz, which noted that an Ecdautodesign Defender 110 makes new Defender buyers genuinely envious.

Every build at Ecdautodesign begins with a complete frame-off teardown, chassis treatment, and a client-directed customization process supported by a real-time 3D rendering configurator. You choose the drivetrain, interior finishes, exterior color, and trim details. The result is a vehicle built to your specification, not a catalog option. If you are ready to discuss your own bespoke Defender build, Ecdautodesign’s team is the place to start that conversation.
FAQ
What does ground-up Defender restoration mean?
A ground-up Defender restoration is a frame-off rebuild that fully disassembles the vehicle to the bare chassis, inspects every component, and rebuilds it from scratch. No part of the vehicle is assumed to be sound without direct inspection.
How long does a full Defender restoration take?
Full ground-up restorations typically span several months, with complex builds running six months or longer depending on parts availability and the extent of structural repairs required.
What does a ground-up Defender restoration cost?
Costs commonly range from £20,000 to £50,000 and vary based on the vehicle’s condition, the choice of OEM versus aftermarket parts, and the degree of modernization included in the build.
What is a restomod Defender?
A restomod Defender preserves the vehicle’s original body and character while replacing or upgrading mechanical systems for modern reliability and safety. The approach maintains historic authenticity in appearance while delivering contemporary driving performance.
Which Defender years are best for restoration?
The best candidates for restoration depend on parts availability, structural condition, and the restorer’s goals. Reviewing top years for restoration helps identify which model years offer the strongest foundation for a ground-up rebuild.
Recommended
- Why Restoring a Custom Defender is Difficult – Custom Defender | Restored Defender Specialists | ECD Auto Design
- How to Restore Your Defender With ECD – Custom Defender | Restored Defender Specialists | ECD Auto Design
- Custom Defender Upgrades You Need – Custom Defender | Restored Defender Specialists | ECD Auto Design
- Largest Defender Restoration Facility in the World – Custom Defender | Restored Defender Specialists | ECD Auto Design
FREQUENTLY ASKED
QUESTIONS
No FAQs configured yet.