


Vehicle Restoration Warranty Explained: What You Need to Know
July 23, 2026
Examples of Extreme Terrain Vehicles: The Builder’s Guide
July 29, 2026
A mission-driven, prioritized build sequence is the fastest path to a Land Rover Defender that performs on technical trails without surrendering a single luxury appointment. The checklist, in priority order: mission definition → tires and brakes → suspension → underbody protection → electrical and lighting → recovery gear → serviceability and spares → comfort and storage → staged budget and timeline. Hand this to your builder at the first scoping call.
Immediate commissioning actions:
- Weigh the vehicle at a certified scale, fully loaded with passengers, fuel, water, and gear
- Define payload targets and confirm you are within GVWR and axle ratings
- Request load-rated spring valving matched to your fully loaded static weight, not curb weight
- Ask for a documented shakedown trip before final sign-off
First-phase items to request from your builder:
- Tire and brake upgrade sized to loaded weight and mission terrain
- Suspension matched to final loaded mass with correct spring rates and damping
- Full-size spare with matching load rating, mounted accessibly
- Dual-battery system with DC-DC charger and fused distribution
- Skid plates covering engine, transmission, transfer case, and fuel tank
- Rated recovery anchors front and rear, professionally installed
- Alignment check and corner-weight measurement post-installation
- Documented build milestones with sign-off at each phase
Table of Contents
- Why mission definition shapes every part you buy
- Core mechanical checklist: suspension, brakes, cooling, and gearing
- Tire and wheel selection: load rating and contact patch over styling
- Recovery gear: when a winch is essential versus when it is not
- Electrical, lighting, and communications for off-grid luxury
- Protection and mounting points: skid plates, sliders, and bumpers
- Comfort, storage, and luxury finishes that survive the trail
- Serviceability, spares, and a staged testing plan
- What does a bespoke Defender build actually cost?
- Questions to ask your builder and red flags to watch for
- How Ecdautodesign approaches a trail-ready Defender build
- Key Takeaways
- Why mission-first planning saves time and money
- Your bespoke, trail-ready Defender starts with a conversation
- Useful sources and further reading
Why mission definition shapes every part you buy
Every smart build begins with honest trip planning: the terrain you will actually drive, the climate you will face, and the distance between resupply points. A Defender that excels on groomed forest roads in summer can feel dangerously underbuilt on rocky switchbacks in early spring.
Your mission checklist:
- Ground types: rock, sand, mud, high-speed gravel, or mixed
- Average trip length and nights off-grid (more nights demand more water, battery, and storage mass)
- Passenger and cargo count (families need safe seating before any luxury upgrade)
- Towing requirements and tongue weight
- Climate extremes: heat stresses cooling, cold stresses batteries and fuel systems
Convert those answers into a payload target. Add passengers, fuel, water, food, recovery gear, tools, and shelter, then leave headroom. Running at the payload limit makes every mile harder on components and tires.
Pro Tip: Ask your builder to show you the math: final curb weight plus full load versus your Defender’s GVWR and front/rear axle ratings. If those numbers are not on paper before parts are ordered, the suspension will be valved for the wrong weight.
Core mechanical checklist: suspension, brakes, cooling, and gearing
Tires and brakes top the priority list because they govern safety before capability. Suspension comes next because it determines how every other system performs under load.
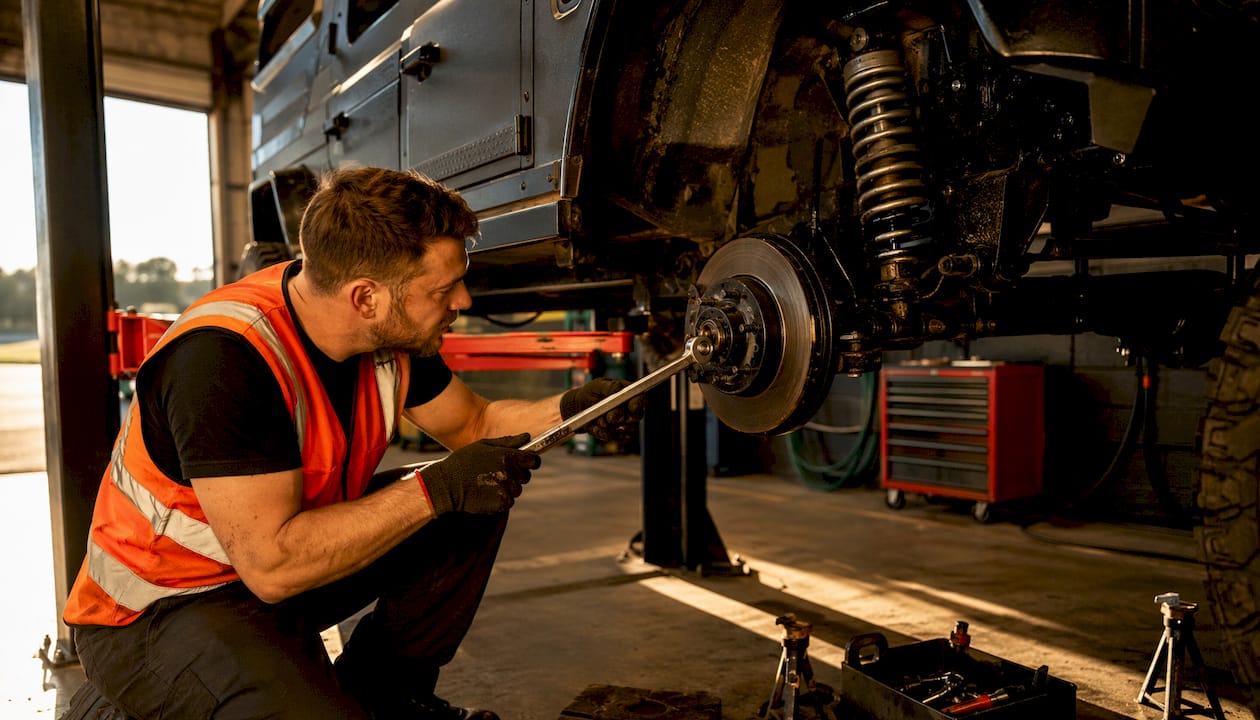
Suspension guidance: Match spring rates and damping to your fully loaded static weight, not the vehicle’s curb weight. A modest 2-inch lift is sufficient for most trail scenarios; lifts beyond 3 inches introduce measurable geometry issues and accelerate wear on CV joints and steering components. The lift benefits are real, but so are the tradeoffs at the extreme end.
| Lift Range | Ground Clearance Gain | Geometry Risk | On-Road Handling Impact |
|---|---|---|---|
| Stock | Baseline | None | Baseline |
| +2 inches | Moderate | Low | Minimal |
| +3 inches or more | High | Elevated (CV, steering wear) | Noticeable degradation |
Additional mechanical priorities:
- Brake pads, rotors, and stainless lines rated for loaded weight and sustained descents
- Gear ratio review when fitting larger tires (larger diameter raises effective gearing, stressing the drivetrain)
- Cooling upgrades for heavy towing or sustained climbs in summer heat
- Axle protection and differential guards on technical routes
Pro Tip: After suspension installation, drive a sustained climb and a long descent fully loaded before calling the build complete. Brake fade and overheating reveal themselves under real conditions, not in a parking lot.
Tire and wheel selection: load rating and contact patch over styling
Tires are the single biggest capability upgrade on any off-road vehicle build. The right carcass transforms a stock platform; the wrong one handicaps even the most expensive suspension.
Selection priorities:
- All-terrain (AT) tires suit most Defender missions: highway-capable, quiet enough for daily use, and genuinely competent on rock, dirt, and light mud. Options like BFGoodrich All-Terrain T/A KO2 and Falken Wildpeak AT3W are proven across mixed terrain.
- Mud-terrain (MT) tires are appropriate only when the majority of miles are in mud, sand, or loose rock. Road noise and wear penalties are significant on highway use.
- Match tire size to your suspension lift for clearance at full lock and full compression. Confirm load index covers your fully loaded axle weight.
- Wheel offset and hub-centric fit matter as much as diameter. A 17-inch wheel typically offers the best balance: sufficient sidewall for airing down, and clearance for modern brake hardware.
- Carry a full-size spare with the same load rating, mounted where it is accessible without unloading the cargo area.
Beadlock or reinforced rims are appropriate for extreme rock-crawling missions where sustained low-pressure operation is required. For most luxury Defender builds combining trail use with daily driving, they add weight and complexity without proportionate benefit.
Pro Tip: Confirm wheel and tire fitment at full suspension compression and full steering lock before finalizing the order. A tire that clears at ride height can contact the fender liner under articulation.
Recovery gear: when a winch is essential versus when it is not
Kinetic recovery gear and traction aids solve the majority of recoveries for most users. A winch is not always the most useful first purchase; budget often serves you better directed toward high-quality tires or a second battery.
Baseline recovery kit:
- Rated kinetic rope (sized to vehicle weight)
- Rated soft shackles (two minimum)
- Snatch block
- Traction boards (two)
- Hi-lift or bottle jack with a base plate for soft ground
- Full-size jack rated for loaded vehicle weight
A winch becomes essential for solo technical travel on remote routes where self-recovery without an anchor tree or a second vehicle is a realistic scenario. For convoy travel or lower-risk routes, the kinetic kit above handles the vast majority of situations at a fraction of the weight and electrical load.
Winch ownership requires significant training. Practice rigging, pull angles, and kinetic rope use locally before relying on the equipment in a remote location. Common mistakes include improper anchor selection, exceeding rated load, and unsafe bystander positioning during a pull.
Pro Tip: Run a full recovery practice session close to home with your exact kit before any remote trip. Gear you have never used under pressure is not recovery gear; it is cargo.
Electrical, lighting, and communications for off-grid luxury
Modern expedition builds rely on planned electrical systems: a dual battery with DC-DC charger, correct wiring gauge, and LiFePO4 chemistry for weight savings and usable capacity benefits.
Prioritized electrical stack:
- Dual battery with DC-DC charger isolating the house bank from the starter battery
- LiFePO4 house battery for weight savings and deeper usable capacity versus AGM
- Correct alternator sizing for accessory load plus charging demand
- Fused distribution block and monitoring shunt
- Weatherproof connectors and relay-switched circuits for all high-draw accessories
Lighting by task:
- Driving beams (spot pattern) for high-speed gravel and open terrain
- Flood lights for camp setup and close-in obstacle reading
- Rock lights for technical low-speed trail work
- All circuits relay-switched with inline fuses; weatherproof connectors throughout
Typical accessory draw estimates for battery sizing:
| Accessory | Approximate Draw |
|---|---|
| 12V compressor fridge | 3–5 A average |
| Satellite communicator (Garmin inReach) | Under 1 A |
| LED light bar | 8 A |
Navigation and communications: Offline topographic maps loaded on a dedicated GPS unit or a device running Gaia GPS or Garmin Explore. A satellite communicator (Garmin inReach or a personal locator beacon) is non-optional for remote travel. Handheld radios for convoy coordination; antenna placement matters for range on broken terrain.
Protection and mounting points: skid plates, sliders, and bumpers
High-quality skid plates and rock sliders protect vital systems and supply safe jacking points. This is mechanical insurance, not an aesthetic upgrade.
Underbody protection priorities:
- Engine skid plate (oil pan and sump)
- Transmission and transfer case skid plates (often the lowest-hanging components)
- Fuel tank skid plate
- Rock sliders along the rocker panels, frame-mounted and rated as jacking points
Bumper choices involve real tradeoffs. A purpose-built steel front bumper improves approach angle, provides a winch mounting position, and adds rated D-ring recovery points. Weight is the cost: a heavy steel bumper shifts front axle loading and affects spring rate requirements. Aluminum options reduce that penalty but carry a higher fabrication cost. Retain factory sensor compatibility where possible, particularly for parking sensors and forward-facing cameras.
Pro Tip: Verify that every recovery anchor is professionally installed and load-rated. Factory tie-down points are not rated for recovery loads. Ask your builder for the rated capacity documentation on every anchor point.
Comfort, storage, and luxury finishes that survive the trail
Roof racks, rooftop tents, and jerry cans raise the center of gravity and reduce stability and fuel efficiency. Low-mounted drawer systems and chassis-mounted auxiliary fuel tanks are almost always preferable for a Defender that doubles as a daily driver.
Storage and comfort priorities:
- Drawer systems and underfloor mounts keep mass low and central
- Modular bins with positive latches prevent rattling on corrugated tracks
- Seat selection for long-distance comfort: orthopedic-grade bolstering matters on multi-day routes
- Durable interior finishes: full-grain leather with protective coating, hardwood trim sealed against humidity
- HVAC and insulation upgrades reduce cabin noise and thermal load, extending comfort on long drives
- Heated seats and premium audio integrate into the electrical budget during the planning phase, not as afterthoughts
Luxury and serviceability are not opposites. Modular elements that can be removed in the field for access to wiring, plumbing, or mechanical components are worth specifying from the outset.
Serviceability, spares, and a staged testing plan
Build in phases and run shakedown trips to collect real-world data before committing to remote routes. Carry interchangeable service parts and avoid proprietary solutions you cannot repair off-grid.
Essential spares and tools:
- Oil, coolant, brake fluid, and differential fluid
- Fuel, air, and oil filters
- Serpentine belt and accessory belts
- Radiator hoses and clamps
- Spare fuses (full set) and relay spares
- Wheel bearing and hub hardware
- Torque wrench, socket set, and common fasteners
- Tire plug kit and portable compressor
Staged testing plan:
| Shakedown Stage | What to Measure |
|---|---|
| Bench and static checks | Ride height at each corner, alignment specs, battery voltage |
| Local loaded loop | Corner weights, brake temperatures, suspension travel |
| Progressive severity trips | Documented adjustments, fluid checks, fastener torque re-check |
What does a bespoke Defender build actually cost?
Budget bands below reflect typical US market ranges for specialist Defender builds. These are directional; final costs depend on base vehicle condition, fabrication complexity, and interior specification.
Three build tiers:
- Trail-ready foundation ($40,000–$70,000 above base vehicle): Suspension, tires, brakes, skid plates, dual battery, recovery anchors, and lighting. Daily-drivable with genuine trail capability.
- Luxury-capable mid-range ($70,000–$120,000 above base): All of the above plus bespoke interior, premium audio, climate upgrades, winch, auxiliary fuel, and full electrical system with LiFePO4.
- Full bespoke expedition ($120,000+ above base): Ground-up restoration, custom drivetrain, air ride or fully tuned coilover suspension, satellite comms, long-range fuel and water, coachbuilt interior, and comprehensive warranty with post-build support.
Typical staging timeline:
- Scoping, payload mapping, and 3D configuration approval: 2–4 weeks
- Core mechanical upgrades (suspension, tires, brakes, protection): 4–8 weeks
- Electrical, lighting, and recovery installation: 2–4 weeks
- Interior, comfort, and final tuning: 4–8 weeks
- Shakedown, alignment verification, and documented sign-off: 1–2 weeks
Cost drivers include bespoke fabrication labor, LiFePO4 battery systems, body restoration quality, and the scope of post-build warranty and support.
Questions to ask your builder and red flags to watch for
A credible specialist welcomes these questions. Evasion or vague answers are the signal.
Commissioning question checklist:
- Can you supply documented axle weights and show how spring valving maps to my fully loaded weight?
- What is your shakedown testing protocol, and do I receive documented results?
- How many Defender builds has your shop completed, and can I speak with a past client?
- Do you offer 3D rendering approvals before fabrication begins?
- What does your post-build warranty cover, and for how long?
- How are build milestones documented, and at what points do I sign off?
A builder who cannot answer the axle-weight question with a number — not an estimate, a measured number — has not done the load calculation that determines whether your suspension will perform correctly. That single question separates experienced Defender specialists from generalists who bolt on lift kits.
Red flags:
- No axle weight verification before suspension selection
- Generic lift kit specified without valving matched to payload
- No documented shakedown trip or post-build alignment check
- No references, build portfolio, or client contacts offered
- Warranty limited to parts only, with no labor or post-build support
How Ecdautodesign approaches a trail-ready Defender build
Ecdautodesign’s process begins with discovery, not parts lists. Every commission opens with a mission profiling session: where you will drive, how many people, what you will carry, and what luxury appointments matter most. That conversation produces a payload map and a specification that drives every subsequent decision, from spring valving to interior finish selection.
The 3D rendering configurator allows clients to visualize and approve every detail before fabrication begins, from paint and trim to drivetrain and suspension specification. Build milestones are documented, and clients sign off at each phase. The shakedown process is structured: axle weights are measured, alignment is verified, and the vehicle completes progressive test drives before delivery.
What clients can expect from Ecdautodesign:
- Mission scoping and payload mapping at the outset
- Bespoke suspension tuning matched to fully loaded weight
- 3D visual approvals before any fabrication commitment
- Specialist Defender experience across drivetrain, interior, and protection systems
- Documented build milestones with client sign-off
- Post-build shakedown testing and warranty coverage
- Access to custom Defender builds recognized by major automotive publications
| Evaluation Criterion | What to look for | Ecdautodesign approach |
|---|---|---|
| Mission scoping | Payload map before parts order | Yes, discovery-first process |
| Suspension tuning | Valved to fully loaded weight | Bespoke per build |
| Visual approvals | 3D renders before fabrication | Yes, proprietary configurator |
| Shakedown testing | Documented axle weights and alignment | Structured, multi-stage |
| Post-build support | Warranty covering labor and parts | Yes, comprehensive |
Pro Tip: Ask to see the 3D configurator early in the conversation. A shop that can render your exact specification before committing to fabrication is a shop that has invested in the process, not just the outcome.
Key Takeaways
A mission-first build sequence, with suspension valved to fully loaded weight and tires matched to terrain, is the single most reliable path to a Defender that performs on trail and remains refined on road.
| Point | Details |
|---|---|
| Mission definition comes first | Define terrain, payload, and climate before ordering any parts. |
| Match suspension to loaded weight | Spring rates valved to curb weight will underperform; always use fully loaded static weight. |
| A 2-inch lift covers most trails | Lifts beyond 3 inches introduce geometry and wear tradeoffs that reduce reliability. |
| Stage the build and shakedown | Run progressive test trips and document axle weights before any remote expedition. |
| Ecdautodesign | Offers discovery-first mission scoping, 3D visual approvals, bespoke suspension tuning, and structured shakedown testing. |
Why mission-first planning saves time and money
The most expensive mistake we see in bespoke Defender builds is a parts list assembled before a payload calculation exists. A client arrives with a vision: a specific lift height, a particular tire size, a winch they saw on another build. Those choices are not wrong in isolation. They become costly when the suspension is valved for a vehicle that weighs 800 pounds less than the finished build.
During one shakedown, we identified that a rear spring rate specified for the unloaded vehicle was causing the rear axle to bottom out under full passenger and gear load. Caught at the shakedown stage, the correction was a spring swap. Discovered 2,000 miles into a remote trip, it would have been a recovery operation. Staged builds and documented shakedowns are not bureaucratic process. They are the mechanism that separates a Defender you can trust from one that looks the part.
Your bespoke, trail-ready Defender starts with a conversation
Ecdautodesign builds each Defender from the ground up, beginning with a mission scoping session that produces a payload map, a suspension specification, and a 3D-rendered visual approval before a single component is ordered. The result is a vehicle that carries its luxury appointments onto the trail without compromise: bespoke leather and hardwood trim alongside load-rated suspension, rated recovery anchors, and a structured shakedown protocol.
Whether your mission is high-speed safari tracks, technical rock routes, or a daily driver that earns its keep on weekend expeditions, the process is the same: define the mission, build to the load, test before you travel. View the portfolio and configurator to see finished builds, then schedule a scoping call to map your specification. Build timelines and restoration warranty details are discussed at the first consultation.
Useful sources and further reading
- Trail Ready Off Road Build Checklist — payload mapping, GVWR checks, and mission-first planning; the most practical starting point for scoping a build.
- Choosing The Right Overland Platform — terrain mix, wheelbase, and platform selection guidance; useful before committing to a base vehicle.
- How to Build an Expedition Rig — phased build approach and shakedown methodology; consult for staging and iterative testing guidance.
- The Ultimate Guide to Overlanding Vehicle Builds — suspension lift tradeoffs and weight management; reference for the geometry and wear data behind the 2-inch lift recommendation.
- 16 Actually-Worth-It Overlanding Gear Upgrades — recovery gear prioritization and winch training guidance; read before purchasing recovery equipment.
- Building the Ultimate Touring 4×4 Setup — electrical system planning, LiFePO4 sizing, and DC-DC charging architecture.
- Ecdautodesign Build Specification Checklist — mission-first specification framework specific to classic SUV and Defender builds.
- Ecdautodesign: Transforming Your Custom Defender — staged build guidance and owner education for Defender-specific commissions.
Recommended
- Due Diligence for Purchasing a Custom Defender – Custom Defender | Restored Defender Specialists | ECD Auto Design
- How to Spec a Custom Defender from Scratch
- Everything You Need to Know About Buying a Used Defender – Custom Defender | Restored Defender Specialists | ECD Auto Design
- The Top 10 Modern Styling Options to Consider for Your Restored Defender – Custom Defender | Restored Defender Specialists | ECD Auto Design
FREQUENTLY ASKED
QUESTIONS
No FAQs configured yet.